Config creator
Introduction
The Config Creator lets you build custom risk bands and metadata fields for use in the reports created by RiskTree Processor. You need only create a custom config if you want to change the riskbands or add metadata to your trees. Separate tabs in the page allow you to configure both the riskbands and the metadata.

Tolerance
The first field allows you to set a default tolerance for your report. This is optional, but if used then your RiskTree report will mark each risk to show whether it is within your chosen tolerance level. You can override the tolerance level by specifying a tolerance level in the Advanced Settings on the Processor page.
Risk bands
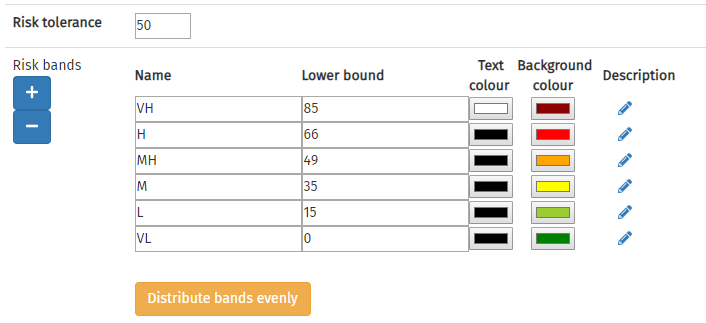
Without customization, RiskTree places risks into six bands from Very High to Very Low . The risk band form allows you to easily rename the bands, set their lower bound, and alter the colour and text colour. A description of the risk can also be added by clicking on the pencil () icon. A tick in a circle next to the pencil () indicates that a description has been provided, and can be viewed by clicking on the pencil.
Risk bands can be added and removed by clicking on the and buttons. New riskbands will be added at the highest end of the risk scale; deleting a risk band will remove the highest one. A Config can contain between four and ten risk bands.
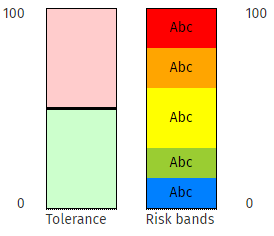
As you change the number and style of your risk bands, the display on the right will adjust to show how the bands are distributed across the risk scale. This shows the colours for the font and background, with the heights relative to the size of each risk band:

The example above shows a custom configuration with five risk bands. The lowest band has been coloured blue, and the bands are not even distributed across the scale. If you do want them to be evenly distributed, click on the button.
Metadata
Metadata allows you to add your own fields into RiskTree, holding data of your choice. For example, you might want a field to store a detailed risk statement for each risk, an owner for a countermeasure, or the review date for a risk. All of these can be done with metadata. In the metadata section of the form, click on the button. This adds a new row to the metadata table. You need to name your field, select the data type, and whether the metadata applies to nodes, countermeasures, or both. Data types are:

| Data type | Description |
|---|---|
| Plain text | Up to 30 characters of unformatted text |
| Formatted text | Text that can use different headings, styles, colours, and have embedded links and images |
| Number | An integer number |
| Date | A calendar date |
| Colour | A colour |
| Percentage | A percentage that is entered using a slider |
| Currency | A number together with the currency symbol |
| List | A pre-defined list of options |
The data types of number, percentage, currency, and list will prompt you for additional parameters. These are optional, except if the field has a dotted purple border (for example, the currency symbol in the picture above). You can use these parameters to set minimum and maximum values, and a step (i.e., increment) for the numeric fields. Currency requires a symbol of up to three characters, and list requires a comma-separated list of values to use.
Metadata can be edited on nodes and countermeasures, as appropriate, within RiskTree Designer. On nodes, the option should be used. On countermeasures, choose the .
Saving and loading files
When you have created your new configuration file, click on the button. The file will be created in JSON format and will download to your computer.
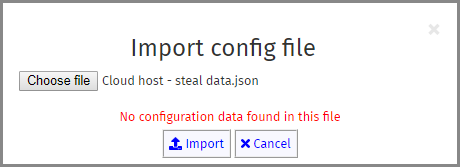
To edit an existing config file, click on the button. A box will open prompting you to choose a file for import. If the file does not contain valid configuration data, an error will be shown:

Please choose a valid file and try importing again.
You can load your config file into RiskTree Designer, in which case the new riskbands and/or metadata will be usable as you build your RiskTrees. The configuration information will be saved into the RiskTree files, and will be used when you pass your RiskTrees into the Processor to create a report. Metadata must be entered in Designer; they cannot be added once a report has been created. If you are just using the custom riskband feature, this can be added when the report is created by including the config file in the list of files to upload (via its own file selector).