The Tag Manager
Introduction
The Tag Manager lets you create and edit tag sets for use in RiskTree. These are saved in JSON format and saved as separate files to your RiskTrees. It can also be used to extract and manage tags from RiskTree files. You can also create new tag sets by importing lists of tags that are held in a spreadsheet, saved in CSV format.
Creating a new tag set
Open the Tag Manager and select the Tag sets tab. Click on the button. A dialogue box will appear, asking you to provide key information about your new tag set:
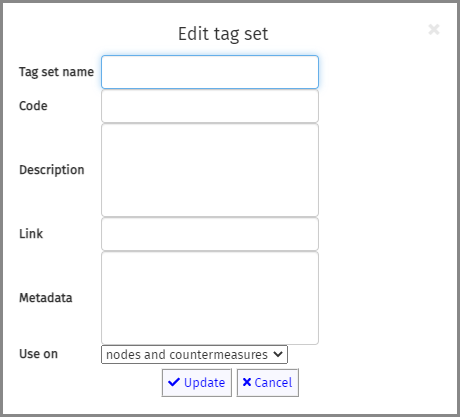
- Name of the tag set (this is mandatory)
- A code for the tag set – this has a maximum of 4 characters and can be displayed within the tags before the tag itself so that you can quickly distinguish between different sets
- Description – a longer piece of text explaining the purpose of the tag set
- A link (optional) to another web page to which the tag set relates
- The usage of the tag set, i.e., can it be used on Nodes, Countermeasures, or both
Click on the Update button when you are ready to start creating tags.
Loading an existing tag set
Select the Load tag files tab. By default, this will let you load a file from your computer by clicking on the button. Make your selection, and click on the button. You will see a pop-up box describing the tag sets in the file; this gives details of the tag set name, any notes and links for them, and the number of tags that they contain:
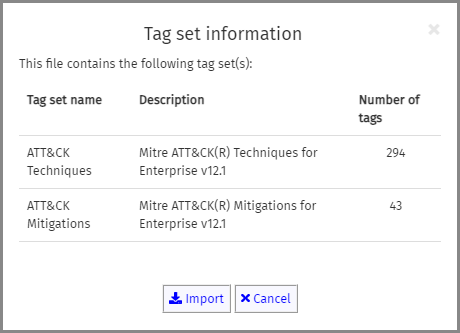
Click on the Import button to import all of the file contents into Tag Manager, or the Cancel button to cancel the import.
The Tags and Tag sets tabs will now be populated with the imported data.
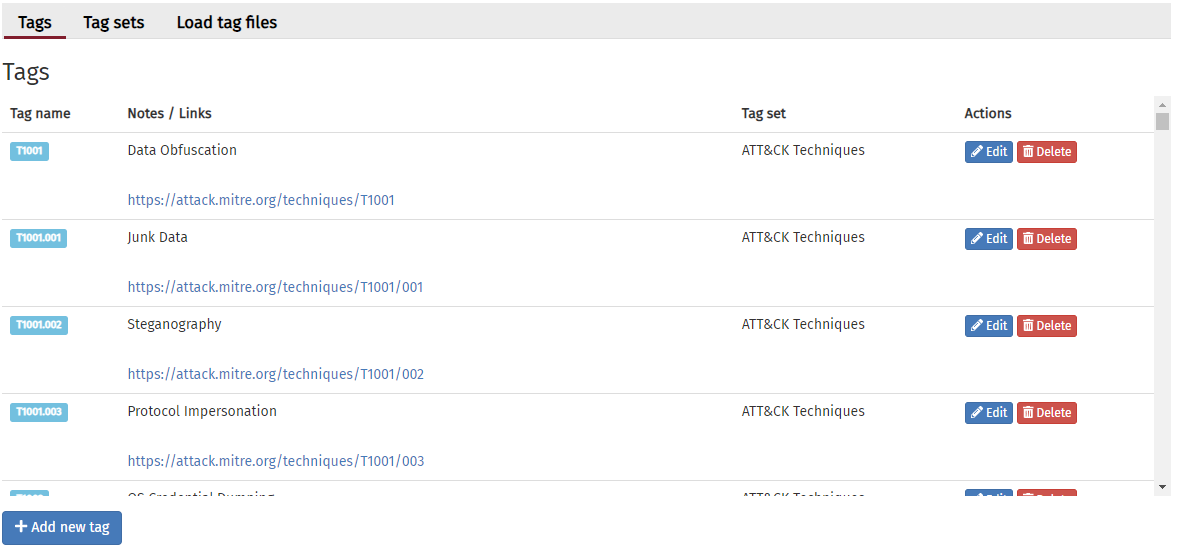
Adding tags
To add a new tag, click on the button. This will open the new tag dialogue box:
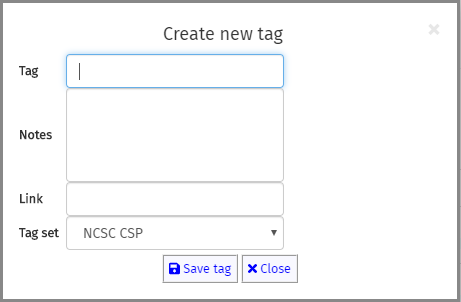
Each tag needs to be given a unique name of up to seven characters; spaces are not permitted, and if used will be converted into underscore characters. As tag names are, usually, too short to provide sufficient information, it is often useful to provide more detail in the accompanying notes field, in which you can format the text using the options above the field. There is also a link field that allows you to link the tag to a web page that provides even more information. This can be a page on the internet or on your local network. Both notes and links are optional information.
If links to local network pages are provided, these will only work for users with access to this network.
The tag set drop-down will contain a list of tag sets that have been loaded or created. Choose the appropriate set, and then click Save tag to save the new tag into the chosen tag set, or Close to lose your changes
Editing tags
Click on the button in the row for the tag that you wish to edit. The tag editor box will open:
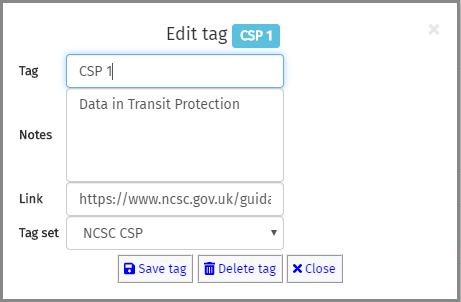
Make any changes that you need to the tag information, including changing the name or the tag set to which it belongs, and then click Save tag to confirm your changes. Clicking the Close button will lose any changes that you have made.
Deleting tags
To delete a tag, either click on the button in the row for the appropriate tag, or, whilst editing the tag, click the Delete tag button in the tag editor.
Saving your tag sets
When you have completed your tag sets, click on the button on the Tag sets tab. This will open up a dialogue box for the file choices. You need to select whether you want all tag sets in the Tag Manager to be saved into a single file, or just one tag set (using the drop-down), and enter a suitable filename. Then click on the Save button to generate the tag file, or Cancel to quit without saving.