Using Tags in Designer
Tags are a powerful way of adding additional layers of data to the nodes and countermeasures in your RiskTree. For more general information about them, please read the Tags overview.
Loading a tag set
The quickest way to start using tags in Designer is by loading an existing tag set. To do this, click  on the side menu. This
will open the tag manager function within RiskTree Designer. Click on the Load tag files tab.
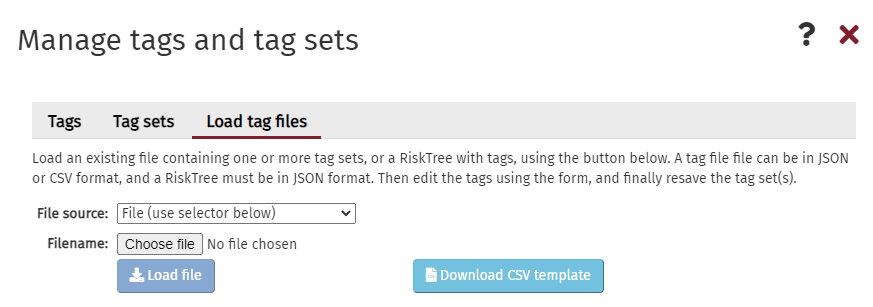
By default, this will let you load a file from your computer by clicking on the button. If you have a premium account, the drop-down will also show pre-built tag libraries. Choosing one of these will remove the Choose file button. Make your selection, and click on the button. The tag set will be checked, and a pop-up box will tell you how many tags are in the set. If you wish to continue loading them, click on the Import button and they will be loaded into RiskTree and be available for you to use.
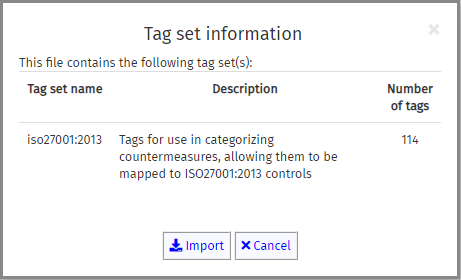
If you load a tag set and it contains tags that have the same name as tags that are already used in your RiskTree, then the pop-up box will explain this. The most common reason for this is that you have loaded a RiskTree that uses some tags from a tag set, and you have loaded the full tag set again. Only the unused tags will be loaded, in effect restoring the full tag set for you to use.
Viewing tags
Node tags
Nodes with tags are given a purple flash in their top right-hand corner:

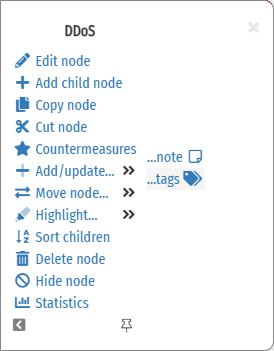
To add a tag to a node, hover over the node you would like to edit the tags of and click the edit node button. When in the node editor, click on the 'Node tags' tab. This will open the tag editor.
Countermeasure tags
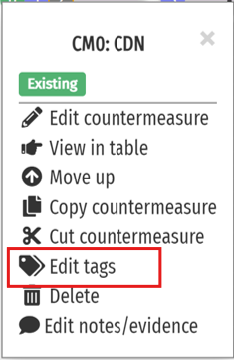
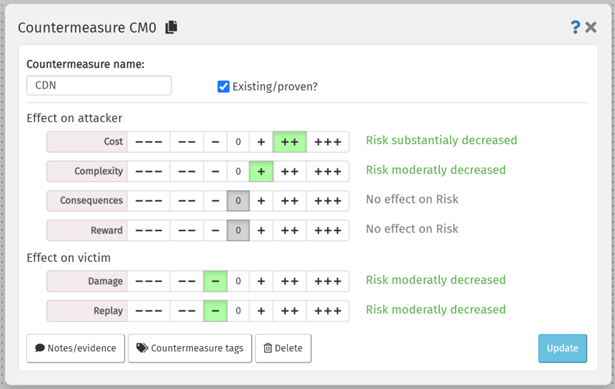
To add a tag to a countermeasure, click the circle countermeasure icon and click Edit tags, or click the 'Countermeasure tags' button from the countermeasures tab of the node editor.
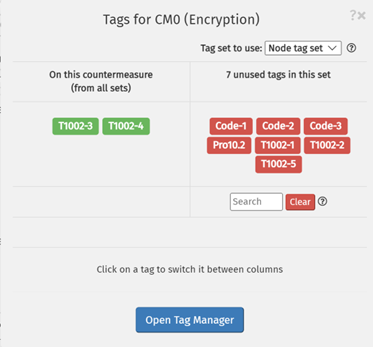
| Open countermeasure tags editor by clicking on the Edit tags in countermeasure menu | Open countermeasure tags editor by clicking on the countermeasure tags button at the bottom of the countermeasure editor | The countermeasure tag editor |
|
 |
 |
Editing tags
The main part of the box shows the tags that already exist on this item, in green (tagname). To the right of these are tags that are part of the currently selected tag set but which are not in use on this item, in red (tagname). To add a red tag to the item, or remove a green tag from the item, click on the tag. Moving the mouse cursor over a tag will display information about the tag and its tag set below the tag lists.
Multiple tag sets can be used at the same time. To change the tag set in use, select from the drop-down above the right-hand panel. You will only be able to see tag sets that relate to the entity type that you are editing (i.e., Nodes or Countermeasures).
You can search through the unused tags by typing in the text field below the red tags. As you type, only those tags that match your search term will remain. The search will check against both the tag name and the notes for the tag. The current term in the search field can be removed by clicking on the button to the right.
If you need to add a new tag to the currently selected entity, click on the button. This will open the Tag Manager tool within Designer, allowing you to add and amend tags.
Saving tags
Any tags that you have used are included when you save your RiskTree in JSON format, together with details of their tag sets. Tags that have not been used will not be included in the file.
You can also save just the tags as a tag library file through The Tag Manager.

In the Tag Manager, click the Tag sets tab and the button to open the Save Tag File dialogue box.
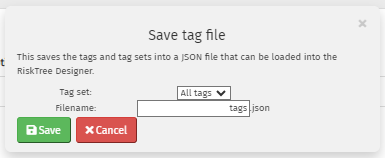
You need to select whether you want all tag sets in the Tag Manager to be saved into a single file, or just one tag set (using the drop-down), and enter a suitable filename. Then click on the Save button to generate the tag file, or Cancel to quit without saving.