The Bow-tie Builder
Getting started
Bow-tie diagrams are created in RiskTree Processor once an assessment report has been created. The process of creating a bow-tie diagram starts with the risks. Go to the Risks tab, and then the Risk table tab. In the Actions column, click on the Manage risk button (highlighted in the red box in the picture below) – this will open the Risk Manager screen.

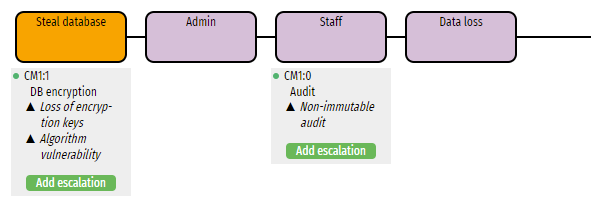
The Risk Manager window has multiple tabs. Click on the Bow-tie builder tab. This will display the selected branch of the RiskTree with the risk at the left, and the root node at the right. Countermeasures are displayed beneath the risks.

Adding an outcome
The first task is to create or assign the specific outcome to this risk. In the example shown above, we want to add the outcome that customer data is stolen for ID theft. Click on the button. This will open the outcome editor.
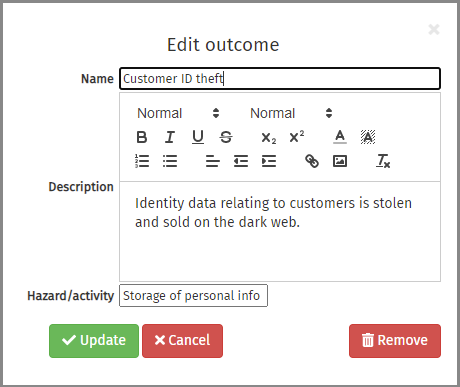
Enter the name of the outcome in the first field, and then write a description in the larger field. The description text can be formatted using the buttons above the field. You can also add an optional hazard or activity with which the outcome is associated. When the outcome is ready, click on the button.
If you have already created some outcomes, they can be reused by entering the same outcome name for subsequent risks. As you enter the name, if a match is found with an existing outcome name, this will appear in a drop-down. Either select the name from the drop-down, or complete typing the name. The description will appear in the larger field. You will not be allowed to edit the description (since this outcome is already in use). Should you need to edit it, click the button. Changes that you make will alter the outcome wherever it is used in this report. To cancel any changes that you have made, click on the button.
 The drop-down, showing an existing outcome |
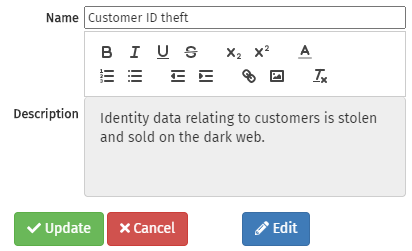 An existing outcome has been chosen. The description cannot be altered unless the Edit button is clicked |

Adding consequences
The diagram will be updated once you have added the outcome. The new outcome is shown as a circle, and you can now start to add the consequences that form the right-hand side of the bow-tie diagram. To add a consequence, click on the button. This will open the consequence editor.
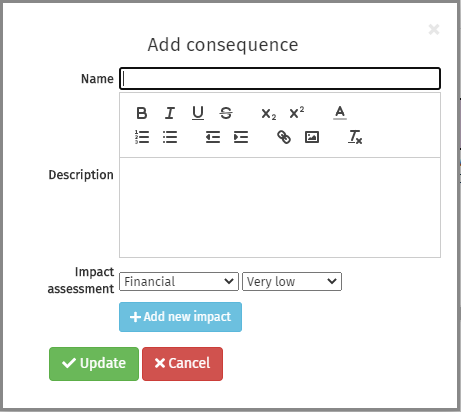
As with the outcome editor, you need to enter the name of the consequence in the first field, and a description in the larger field. If a consequence already exists, its name will appear in the drop-down as you type. If you select an existing mitigation then it cannot be edited until you press the button.
You can also assign impacts to the consequence. These describe the effects of the consequence happening. You can choose up to three impacts, and for each impact a rating must be assigned, from Very Low to Critical. Once the first impact has been created, click the . You will not be able to reuse an impact (i.e., you cannot assign more than one impact of the same type). To remove an impact, click on the button to the right. When the consequence is complete, click on the button. The diagram will now show your new consequence.

Adding mitigations
Mitigations are added in the same way as outcomes and consequences. Click on the button on the related consequence to open the mitigation editor.
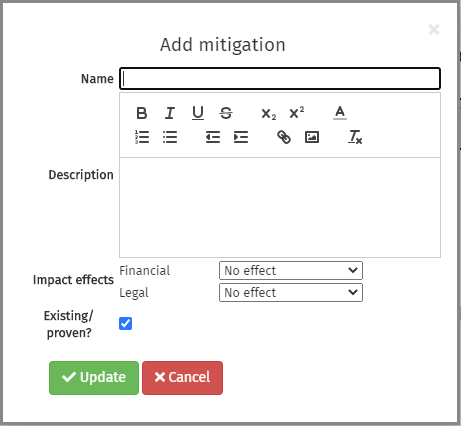
You must give your mitigation a name, and can optionally provide a description. Each mitigation is independent, so the name fields will not suggest existing mitigations as you type. You can create duplicate mitigations with the same name, and these will be completely independent. Mitigations affect the impacts on their related consequences, so you will see a drop-down for each impact below the description field. Use these to select the level of the effect that the mitigation will provide. You can also specify whether a mitigation exists currently, or if it is a target mitigation, using the check-box. Click on the button to create the new mitigation and view it on the diagram. Mitigations will be grouped to the right of their associated consequence, with a coloured dot to show whether they are existing or target.

Adding escalation points
Escalation points are things that will reduce the value of the countermeasures. For example, a countermeasure of 'encryption' might have an escalation point of 'Weakness found in chosen algorithm'. RiskTree allows escalation points to be added, but they do not alter the risk calculations; they are purely displayed on bow-tie diagrams.
To add escalation points, click on the button. This opens the editor which allows you to enter a name and description of the escalation point. Each escalation point will be shown with a black triangle icon ( ▲ ) in the countermeasure information block, beneath the node. A maximum of three escalation points can be set for a countermeasure.
