Creating Risk groups
Introduction
RiskTree enables you to create groups of risks that do not all fit under the same branch of the tree. For example, you might create a tree in which several different branches contain risks relating to failures of the Joiners/Movers/Leavers (JML) processes. By creating a JML group, you can associate these risks together and examine these risks together in the RiskTree Processor. Another grouping could be risks affecting personally identifyable information (PII).
Creating groups
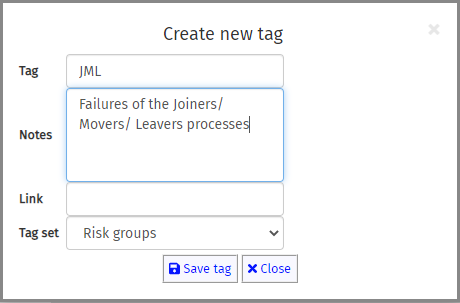
Risk groups are created using the Tag Manager tool. Open the tool, start a new group by clicking the button, and create a tag for each of your groups. It is recommended that you create a description for each group, using the notes field.

Each group name must be unique and cannot be the same as any other tags that you use in your RiskTrees. Once you have created the tag set containing your risk groups, remember to save it by clicking on the button.
Using groups
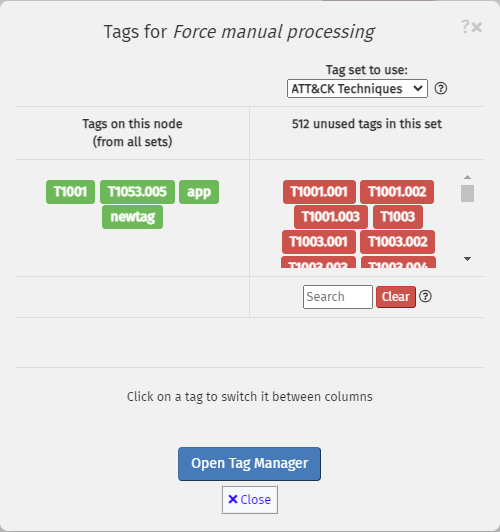
To use your risk group tags within the RiskTree Designer, you first need to load the tag file that you created in the previous step. Click on Import file and select the Tags tab. Use the file selector to locate your file, and import it into Designer. Once the tags have been loaded, you can then associate each risk with one or more groups by using the menu option on the risk. This opens the tag editor box:

Ensure that the drop-down in the top-right shows the name of your risk groups tag set. You will then be able to pick the relevant risk group tag from the list of tags in red on the right-hand side of the editor. Once chosen, the tag will move to the left-hand side and be shown in green.
Analysing your risk groups
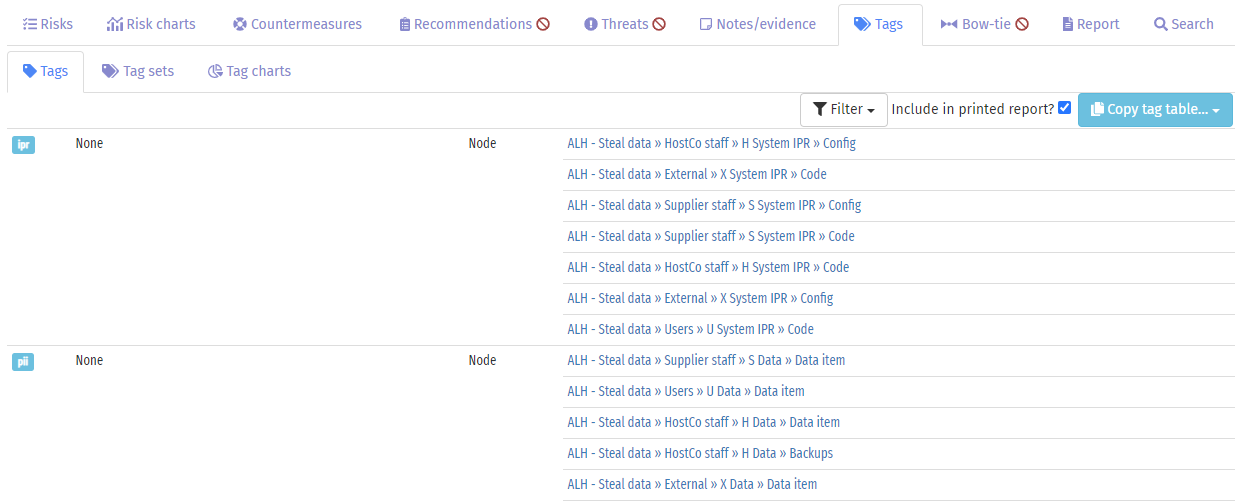
To make use of your risk groups, you will need to create a risk assessment report using RiskTree Processor. Your risk group tags will be shown in the Tags tab, listing the risks that are in each group.

To filter your risks by their groups, click on the button above the main tab bar. This will open the filtering menu (below, left). In the main drop-down, select tags (below, right):

Type the names of the risk group tags by which you wish to filter into the main search box. After each tag name, press SPACE or RETURN. As the tags are matched, they will appear below the search box in their usual blue format (below, left). If a name does not match, the search field will go red and a warning message will appear (below, right).

As tags are matched, the risks will be automatically filtered. The tables showing the Risk Summary, Risks, Countermeasures, and Recommendations will be dynamically filtered to only show risks that match the selected tags. If more than one tag is selected, the drop-down to the left of the list can be used to choose whether only risks matching all of the tags (AND matching) or any of the tags (OR matching) is performed. This drop-down will only be enabled if at least two tags are selected. To remove tags from the selection, simply click on the blue tag in the list.
The risk charts do not update until the filtering menu box is closed, either by clicking on the × in the top-right corner of the filter menu, or by clicking on a tab button.
The filters will remain active until you re-open the menu and select Show all risks. To remind you that filters are set, the filter button is highlighted in blue, with a red icon.
